You are browsing unreleased documentation.
The following options can be configured to manage claims verification during authorization:
-
config.scopes_claimandconfig.scopes_required -
config.audience_claimandconfig.audience_required -
config.groups_claimandconfig.groups_required -
config.roles_claimandconfig.roles_required
For example, the first configuration option, config.scopes_claim, points to a source, from which the value is
retrieved and checked against the value of the second configuration option: config.scopes_required.
Prerequisites
In most cases, the OpenID Connect plugin relies on a third party identity provider (IdP). The examples in this guide use Keycloak as a sample IdP.
Expand the following sections to configure Keycloak and Kong Gateway.
Configure Keycloak
All the *.test domains in the following examples point to the localhost (127.0.0.1 and/or ::1).
We use Keycloak as the identity provider in the following examples, but the steps will be similar in other standard identity providers. If you encounter difficulties during this phase, refer to the Keycloak documentation.
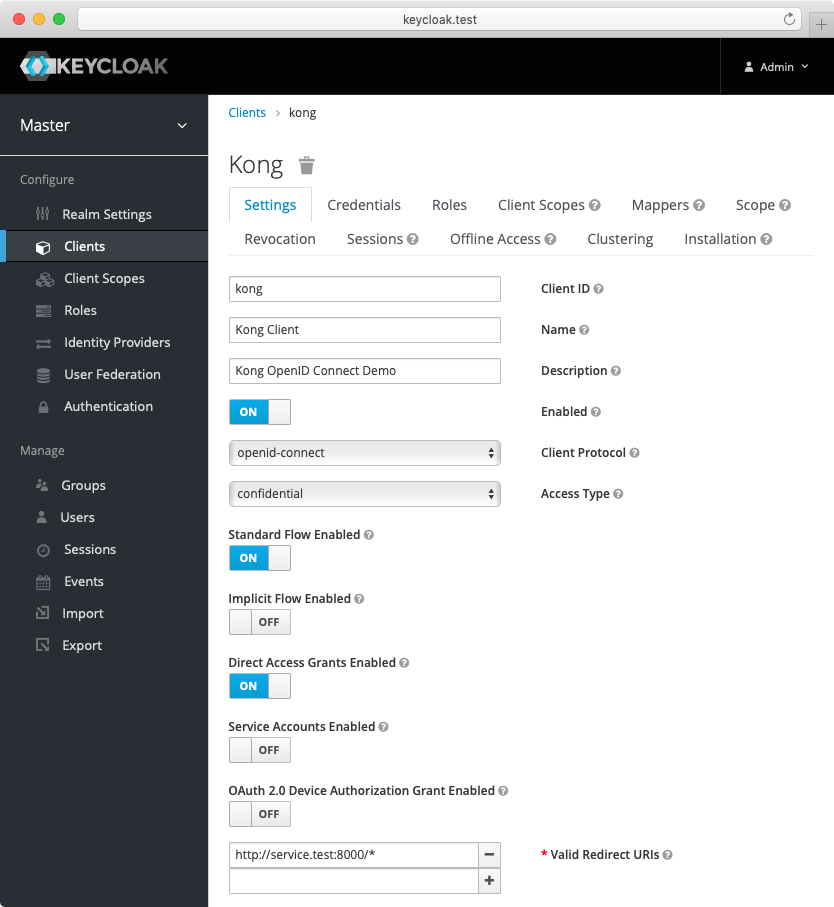
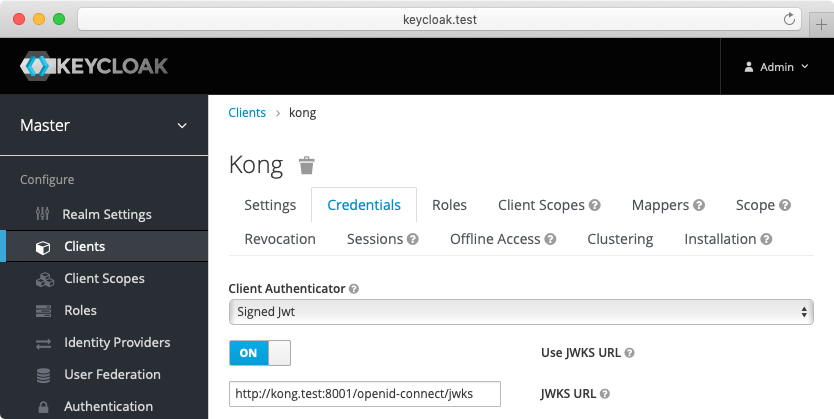
- Create a confidential client
kongwithprivate_key_jwtauthentication and configure Keycloak to download the public keys from [the OpenID Connect Plugin JWKS endpoint][json-web-key-set]:
-
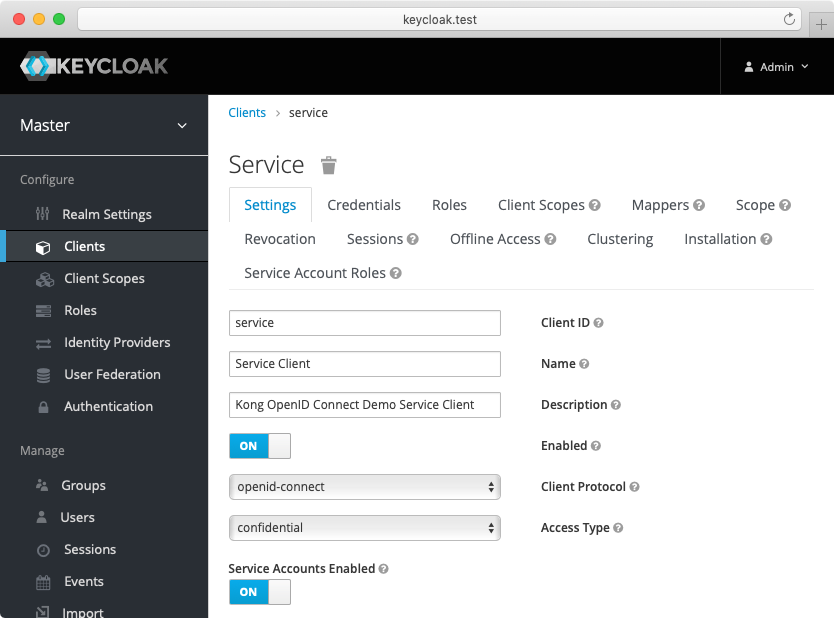
Create another confidential client
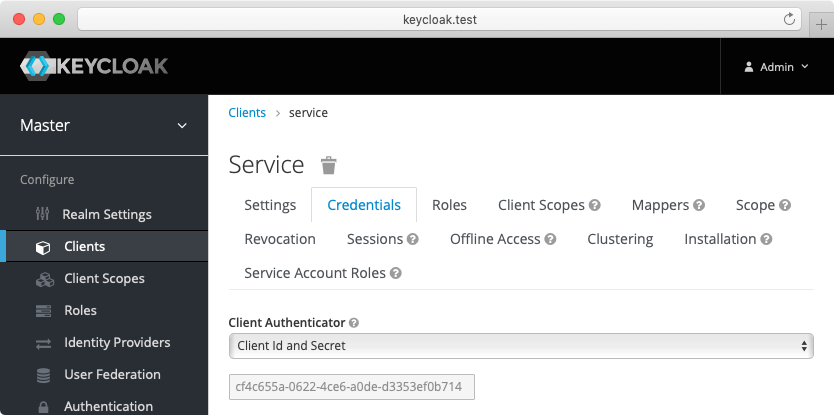
servicewithclient_secret_basicauthentication. For this client, Keycloak will auto-generate a secret similar to the following:cf4c655a-0622-4ce6-a0de-d3353ef0b714. Enable the client credentials grant for the client:
-
(Optional) Create another confidential client
cert-boundwith settings similar to theserviceclient created previously. From the Advanced tab, enable the OAuth 2.0 Mutual TLS Certificate Bound Access Tokens Enabled toggle. -
(Optional, to test mTLS Client Authentication) Create another confidential client
client-tls-authwith settings similar to theserviceclient created above. From the Credentials tab, select the X509 Certificate Client Authenticator and fill the Subject DN field so that it matches the Kong client certificate’s, e.g.:CN=JohnDoe, OU=IT. -
(Optional, to test Demonstrating Proof-of-Possession Client Authentication) Create another confidential client
client-dpop-authwith settings similar to theserviceclient created above. From the Advanced tab, enable theOAuth 2.0 DPoP Bound Access Tokens Enabled toggle. - Create a verified user with the name:
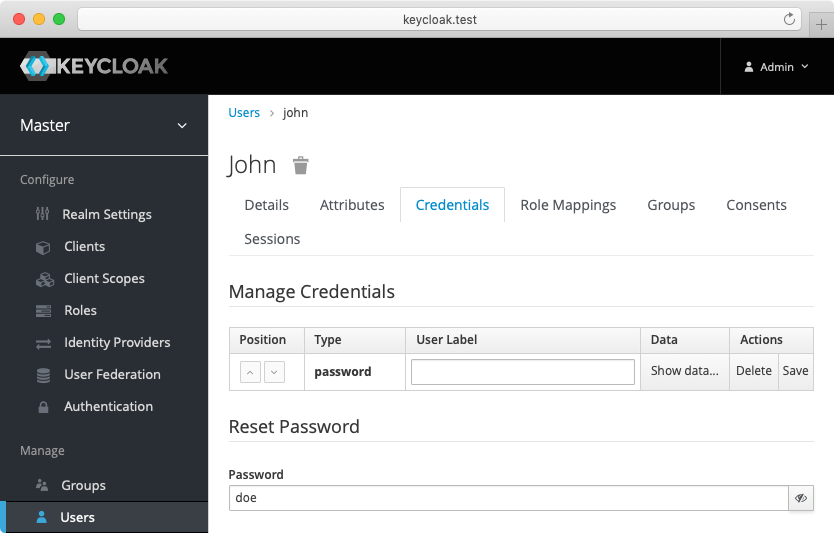
johnand the non-temporary password:doethat can be used with the password grant:
Alternatively you can download the exported Keycloak configuration, and use it to configure the Keycloak. Please refer to Keycloak import documentation for more information.
You need to modify Keycloak standalone.xml configuration file, and change the socket binding from:
<socket-binding name="https" port="${jboss.https.port:8443}"/>
to
<socket-binding name="https" port="${jboss.https.port:8440}"/>
The Keycloak default https port conflicts with the default Kong TLS proxy port,
and that can be a problem if both are started on the same host.
Note: The mTLS Client Authentication, along with the proof of possession feature that validates OAuth 2.0 Mutual TLS Certificate Bound Access Tokens, both require configuring Keycloak to validate client certificates with mTLS using the
--https-client-auth=requestoption, and to configure TLS appropriately, including adding the trusted client certificates to the truststore. For more information, refer to the Keycloak documentation.
Configure Kong Gateway
-
Create a service:
curl -i -X POST http://localhost:8001/services \ --data "name=openid-connect" \ --data "url=http://httpbin.org/anything" -
Create a route:
 curl -i -X POST http://localhost:8001/services/openid-connect/routes \
   --data "name=openid-connect" \
   --data "paths[]=/"
Claims-based authorization
The following examples are built with simplicity in mind, and are not meant for a production environment. Because
httpbin.orgis the upstream service in these examples, we highly recommended that you do not run these examples with a production identity provider as there is a high chance of leaking information. The examples also use the plain HTTP protocol, which you should never use in production.
First, configure the OpenID Connect plugin. For the purposes of the demo, you can use the password grant.
For the demo, we’re going to set up the following:
- Issuer, client ID, and client auth: settings that connect the plugin to your IdP (in this case, the sample Keycloak app).
- Auth method: password grant (enabled for demo purposes).
-
We require the values
openidandemailto be present in thescopeclaim of the access token.A claim payload may contain arbitrary claims, such as user roles and groups, but as you didn’t configure them in Keycloak, let’s just use the claims that are configured. In this case, we want to authorize against the values in
scopeclaim.
Test the claims-based authorization
Retrieve access token
In this example, the password grant lets you obtain a JWT access token, enabling you to test how JWT access token authentication works. One way to get a JWT access token is to issue the following call (we use jq to filter the response):
curl --user john:doe http://localhost:8000/openid-connect \
    | jq -r .headers.Authorization
Output:
Bearer <access-token>
The signed JWT <access-token> (JWS) composed of three parts, each separated with a dot character .:
<header>.<payload>.<signature> (a JWS compact serialization format).
We are interested with the <payload>, and you should have something similar to:
eyJleHAiOjE2MjI1NTY3MTMsImF1ZCI6ImFjY291bnQiLCJ0eXAiOiJCZWFyZXIiLC
JzY29wZSI6Im9wZW5pZCBlbWFpbCBwcm9maWxlIiwicHJlZmVycmVkX3VzZXJuYW1l
Ijoiam9obiIsImdpdmVuX25hbWUiOiJKb2huIiwiZmFtaWx5X25hbWUiOiJEb2UifQ
That can be base64 url decoded to the following JSON:
{
    "exp": 1622556713,
    "aud": "account",
    "typ": "Bearer",
    "scope": "openid email profile",
    "preferred_username": "john",
    "given_name": "John",
    "family_name": "Doe"
}
Access the service
Try accessing the service:
curl --user john:doe http://localhost:8000
You should get an HTTP 200 response.
If you set a claim that isn’t enabled in your IdP, you will get a 403 Forbidden response instead.
For example, if you also add audience_claim = aud to the plugin’s configuration and try to access it with your Keycloak credentials from the prerequisites, the response will be a 403, as the access token has "aud": "account", and that does not match "httpbin".
Arrays in claims-based configuration
A few words about config.scopes_claim and config.scopes_required (and the similar configuration options).
You may have noticed that config.scopes_claim is an array of string elements. Why? It is used to traverse
the JSON when looking up a claim, take for example this imaginary payload:
{
    "user": {
        "name": "john",
        "groups": [
            "employee",
            "marketing"
        ]
    }
}
In this case you would probably want to use config.groups_claim to point to groups claim, but that claim
is not a top-level claim, so you need to traverse there:
- Find the
userclaim. - Inside the
userclaim, find thegroupsclaim, and read its value:
{
    "config": {
        "groups_claim": [
            "user",
            "groups"
        ]
    }
}
or
curl -i -X PATCH http://localhost:8001/plugins/5f35b796-ced6-4c00-9b2a-90eef745f4f9 \
  --data "config.groups_claim=user" \
  --data "config.groups_claim=groups"
The value of a claim can be the following:
- a space separated string (such as
scopeclaim usually is) - an JSON array of strings (such as the imaginary
groupsclaim above) - a simple value, such as a
string
What about the config.groups_required then? That is also an array?
That is correct, the required checks are arrays to allow logical and/or type of checks:
-
and: use a space separated values -
or: specify value(s) in separate array indices
For example:
{
    "config": {
        "groups_required": [
            "employee marketing",
            "super-admins"
        ]
    }
}
or
curl -i -X PATCH http://localhost:8001/plugins/5f35b796-ced6-4c00-9b2a-90eef745f4f9 \
  --data "config.groups_required=employee marketing" \
  --data "config.groups_required=super-admins"
The above means that a claim has to have:
-
employeeandmarketingvalues in it, OR -
super-adminsvalue in it


