You are browsing unreleased documentation.
Password grant workflow
Password grant is a legacy authentication grant. This is a less secure way of authenticating end users than the authorization code flow, because, for example, the passwords are shared with third parties. The image below illustrates the grant:
sequenceDiagram
    autonumber
    participant client as Client
(e.g. mobile app)
    participant kong as API Gateway
(Kong)
    participant idp as IDP
(e.g. Keycloak)
    participant httpbin as Upstream
(backend service,
 e.g. httpbin)
    activate client
    activate kong
    client->>kong: service with
basic authentication
    deactivate client
    kong->>kong: load
basic authentication
credentials
    activate idp
    kong->>idp: keycloak/token with
client credentials and
password grant
    deactivate kong
    idp->>idp: authenticate client and
verify password grant
    activate kong
    idp->>kong: return tokens
    deactivate idp
    kong->>kong: verify tokens
    activate httpbin
    kong->>httpbin: request with access token
    httpbin->>kong: response
    deactivate httpbin
    activate client
    kong->>client: response
    deactivate kong
    deactivate client
Prerequisites
In most cases, the OpenID Connect plugin relies on a third party identity provider (IdP). The examples in this guide use Keycloak as a sample IdP.
Expand the following sections to configure Keycloak and Kong Gateway.
Configure Keycloak
All the *.test domains in the following examples point to the localhost (127.0.0.1 and/or ::1).
We use Keycloak as the identity provider in the following examples, but the steps will be similar in other standard identity providers. If you encounter difficulties during this phase, refer to the Keycloak documentation.
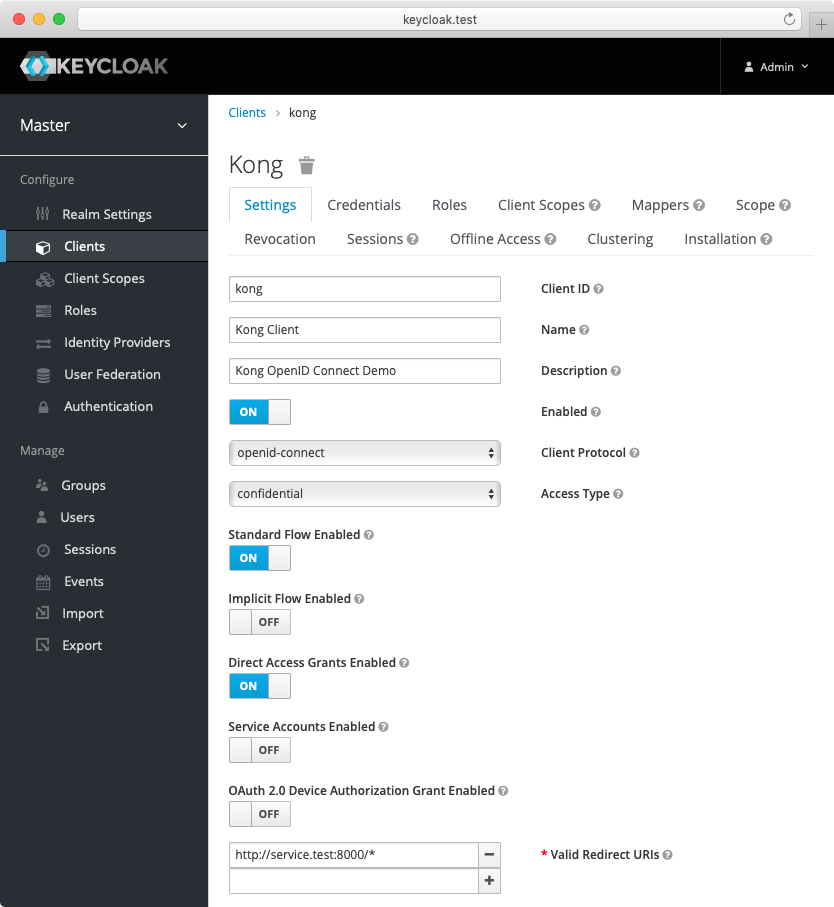
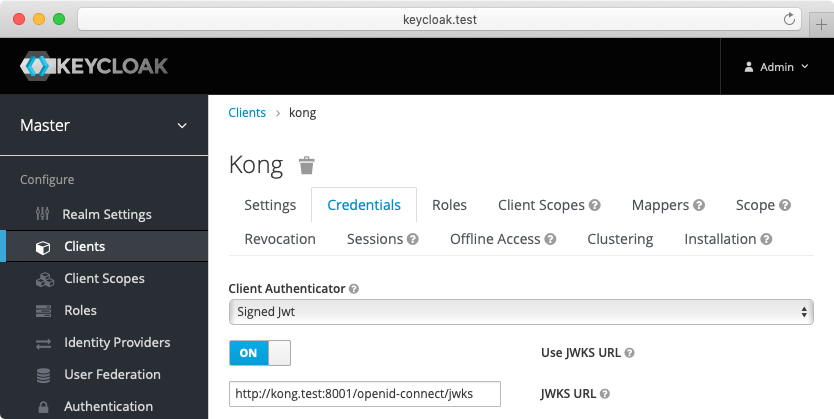
- Create a confidential client
kongwithprivate_key_jwtauthentication and configure Keycloak to download the public keys from [the OpenID Connect Plugin JWKS endpoint][json-web-key-set]:
-
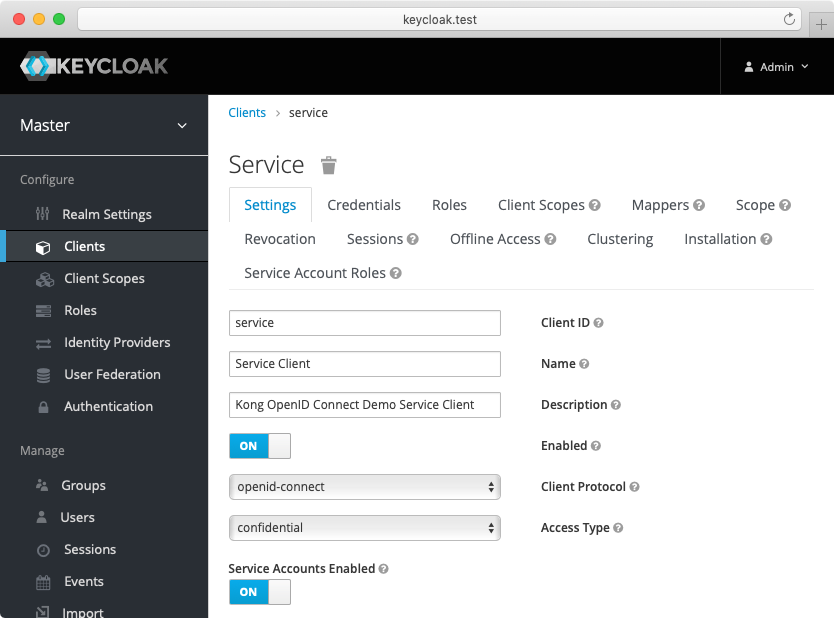
Create another confidential client
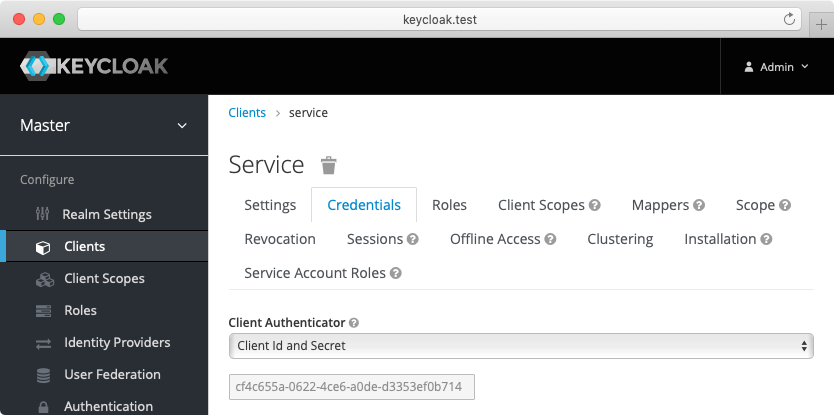
servicewithclient_secret_basicauthentication. For this client, Keycloak will auto-generate a secret similar to the following:cf4c655a-0622-4ce6-a0de-d3353ef0b714. Enable the client credentials grant for the client:
-
(Optional) Create another confidential client
cert-boundwith settings similar to theserviceclient created previously. From the Advanced tab, enable the OAuth 2.0 Mutual TLS Certificate Bound Access Tokens Enabled toggle. -
(Optional, to test mTLS Client Authentication) Create another confidential client
client-tls-authwith settings similar to theserviceclient created above. From the Credentials tab, select the X509 Certificate Client Authenticator and fill the Subject DN field so that it matches the Kong client certificate’s, e.g.:CN=JohnDoe, OU=IT. -
(Optional, to test Demonstrating Proof-of-Possession Client Authentication) Create another confidential client
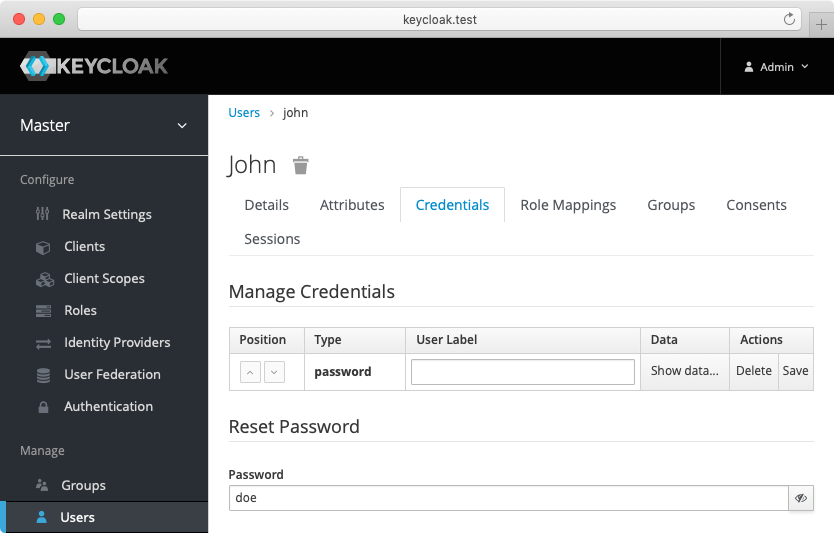
client-dpop-authwith settings similar to theserviceclient created above. From the Advanced tab, enable theOAuth 2.0 DPoP Bound Access Tokens Enabled toggle. - Create a verified user with the name:
johnand the non-temporary password:doethat can be used with the password grant:
Alternatively you can download the exported Keycloak configuration, and use it to configure the Keycloak. Please refer to Keycloak import documentation for more information.
You need to modify Keycloak standalone.xml configuration file, and change the socket binding from:
<socket-binding name="https" port="${jboss.https.port:8443}"/>
to
<socket-binding name="https" port="${jboss.https.port:8440}"/>
The Keycloak default https port conflicts with the default Kong TLS proxy port,
and that can be a problem if both are started on the same host.
Note: The mTLS Client Authentication, along with the proof of possession feature that validates OAuth 2.0 Mutual TLS Certificate Bound Access Tokens, both require configuring Keycloak to validate client certificates with mTLS using the
--https-client-auth=requestoption, and to configure TLS appropriately, including adding the trusted client certificates to the truststore. For more information, refer to the Keycloak documentation.
Configure Kong Gateway
-
Create a service:
curl -i -X POST http://localhost:8001/services \ --data "name=openid-connect" \ --data "url=http://httpbin.org/anything" -
Create a route:
 curl -i -X POST http://localhost:8001/services/openid-connect/routes \
   --data "name=openid-connect" \
   --data "paths[]=/"
Set up password grant auth
The following examples are built with simplicity in mind, and are not meant for a production environment. Because
httpbin.orgis the upstream service in these examples, we highly recommended that you do not run these examples with a production identity provider as there is a high chance of leaking information. The examples also use the plain HTTP protocol, which you should never use in production.
Using the Keycloak and Kong Gateway configuration from the prerequisites, set up an instance of the OpenID Connect plugin with the password grant.
For the demo, we’re going to set up the following:
- Issuer, client ID, and client auth: settings that connect the plugin to your IdP (in this case, the sample Keycloak app).
- Auth method: you only need the password grant for this flow.
- We want to only search headers for credentials for the password grant.
With all of the above in mind, let’s test out the password grant with Keycloak.
Enable the OpenID Connect plugin on the openid-connect service:
Test the password grant
At this point you have created a service, routed traffic to the service, and enabled the OpenID Connect plugin on the service. You can now test the password grant.
Request the service with basic authentication credentials created in the Keycloak configuration step:
curl --user john:doe http://localhost:8000
You should get an HTTP 200 response with a basic auth header:
GET / HTTP/1.1
Authorization: Basic BEkg3bHT0ERXFmKr1qelBQYrLBeHb5Hr
If you make another request using the same credentials, you should see that Kong adds less latency to the request as it has cached the token endpoint call to Keycloak.


